Water damage restoration involves several critical steps to guarantee safety and efficiency. Start by evaluating the damage and documenting findings. Always prioritize safety by using protective gear and examining electrical hazards. Follow with effective water extraction using appropriate equipment, then move on to drying and dehumidifying the area to prevent mold. Clean and sanitize surfaces based on water type to eliminate contaminants. Finally, repair structural issues and implement preventative measures to avoid future damage. Each step is vital for a thorough restoration process, and understanding these elements will improve your strategy in dealing with water damage effectively.
Assessing the Damage
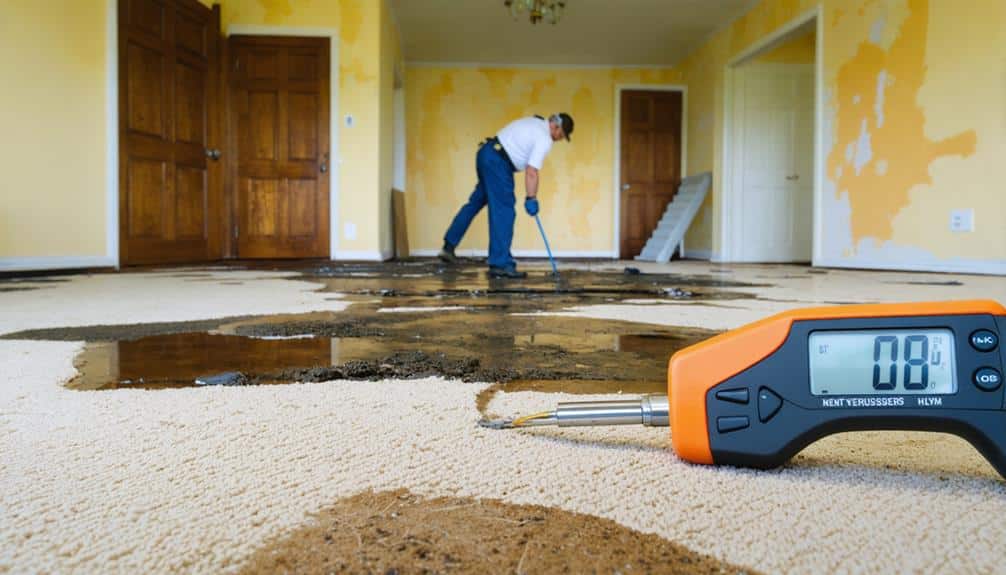
Evaluating the damage is a crucial first step in the water damage restoration process. You need to thoroughly inspect the affected areas to determine the extent of moisture exposure and potential hazards like mold growth. Start by checking walls, ceilings, and floors for signs of water intrusion and staining. Don't forget to examine hidden spaces, such as behind appliances and inside cabinets, where moisture might linger unnoticed. Understanding the impact of water damage on your property will help you recognize the urgency of the situation.
Documenting your findings is fundamental for both your records and insurance claims. Take photos and notes detailing specific damages, including the type of materials affected and any visible mold issues. This documentation can help expedite your claims process and guarantee you receive the compensation you deserve.
Pay close attention to the severity of the damage. If you notice extensive mold growth, immediate action is crucial, as it can lead to health risks and further structural issues. Understanding the scope of the damage will guide your restoration efforts and help you prioritize tasks effectively. By taking these steps, you'll set a solid foundation for a successful water damage restoration journey.
Ensuring Safety First
When dealing with water damage, ensuring safety is paramount. Before you engage in the restoration process, assess your environment and prepare accordingly. Start by donning appropriate safety gear, including gloves, boots, and masks. This gear will protect you from contaminants often present in standing water and damp materials. Furthermore, evaluate electrical hazards by turning off the main power supply before entry, as this is vital to prevent electrocution risks safety precautions to take.
Next, make sure you've established a clear plan. Identify emergency contacts, including local fire departments, utilities, and water damage restoration services. Having these contacts readily available allows for quick action should your situation escalate.
If the water damage is extensive, turn off the electricity to prevent electrocution risks. Don't wade into deep water without first checking for hazards like live wires or structural instability.
As you proceed, keep your safety gear on and maintain a clear exit route at all times. Remember, your safety should never be compromised for the sake of saving items or materials.
Water Extraction Techniques

When it comes to water extraction, understanding the types of equipment available is essential for effective results. Specialized water extraction services, like those offered by Emergency response teams, guarantee rapid assessments and immediate action during floods, which can greatly mitigate damage. You'll need to weigh the benefits of manual versus automated methods to determine the best approach for your situation. Furthermore, prioritizing safety precautions during the extraction process will protect both you and the property from further damage.
Types of Extraction Equipment
Understanding the types of extraction equipment available is vital for effective water damage restoration. You'll encounter various extraction tools designed to remove excess water quickly and efficiently, guaranteeing your space is restored to its original condition. The most common equipment includes submersible pumps, which are ideal for removing standing water in flooded areas, and truck-mounted extraction units, which offer powerful suction for larger jobs.
Portable extractors are also beneficial, allowing for flexibility and mobility in tight spaces. These machines are typically equipped with heated water, enhancing the extraction process. It's important to pay attention to equipment maintenance; keeping your tools in peak condition not only extends their lifespan but also improves efficiency during restoration. Regularly check hoses, filters, and pumps for clogs or wear and tear.
Moreover, specialized tools like carpet wands and hard surface extractors can help you tackle specific materials effectively. By understanding the various types of extraction equipment at your disposal and committing to proper maintenance, you'll guarantee a successful water damage restoration process, empowering you to reclaim your space from the effects of water intrusion.
Manual vs. Automated Methods
Often, water damage restoration professionals must choose between manual and automated methods for water extraction, each offering distinct advantages and challenges. Understanding the nuances between manual techniques and automated solutions is vital for effective restoration.
| Method Type | Advantages | Considerations |
|---|---|---|
| Manual Techniques | Greater control & precision | Higher labor implications, time investment |
| Automated Solutions | Increased efficiency & speed | Technology integration may require training |
When performing a cost comparison, manual techniques might involve higher labor costs, while automated solutions can markedly reduce time investment. Nevertheless, efficiency analysis reveals that automated systems often yield faster results, which can be fundamental in emergency scenarios.
User experience is another important factor; while manual techniques allow for hands-on adjustments, automated solutions provide consistency and reduce the risk of human error. As you weigh your options, consider the specific context of the water damage situation. Each method has its place, and the right choice depends on your unique circumstances, balancing speed, efficiency, and overall effectiveness in water extraction.
Safety Precautions During Extraction
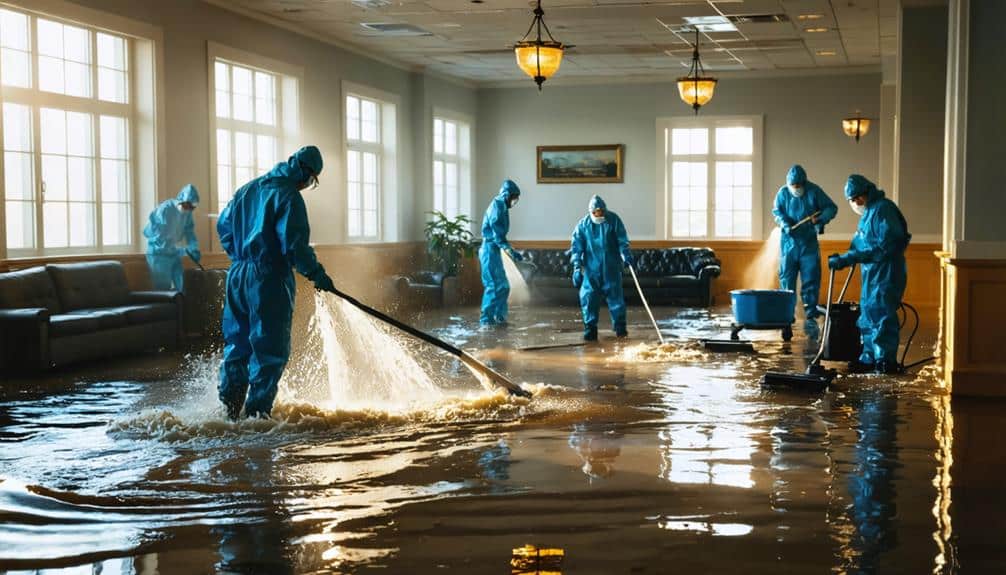
Before diving into water extraction, it's crucial to prioritize safety to protect yourself and others on-site. Start by utilizing personal protective equipment (PPE), such as gloves, masks, and waterproof boots, to guard against moisture hazards and potential contamination sources. Confirm you've completed equipment training to operate extraction tools effectively and safely.
Always assess the environment for any electrical hazards before beginning the extraction process. If standing water is present, turn off electricity to prevent electrocution. Implement emergency procedures, like having a first-aid kit readily available and knowing the location of exits in case of an emergency.
Consider the health risks associated with water damage, including mold growth and bacterial contamination. If flood insurance is applicable, document the damage thoroughly for claims processing. This step not only aids in financial recovery but additionally verifies you're aware of all potential hazards before extraction.
Lastly, maintain clear communication with your team throughout the process. Regularly discuss safe extraction techniques and updates on the situation to cultivate a secure working environment. By adhering to these practices, you'll effectively mitigate risks during water extraction and guarantee a safer restoration process.
Drying and Dehumidifying
Rapid drying is essential to prevent mold growth and further structural damage after water intrusion. When selecting a dehumidifier, consider factors like capacity and energy efficiency to optimize your drying process. Monitoring humidity levels throughout the restoration guarantees that the environment remains favorable to effective drying.
Importance of Rapid Drying
When water infiltrates a structure, the clock starts ticking on effective restoration; swift drying is vital to minimize damage and prevent secondary issues like mold growth. Rapid drying is critical for maintaining moisture control, as lingering dampness creates an ideal environment for mold spores to thrive. By addressing water issues promptly, you can save time, costs, and preserve the integrity of your property.
Here's a quick overview of the effects of delays in drying:
| Delay in Drying | Consequences |
|---|---|
| 24 hours | Mold begins to develop |
| 48 hours | Structural damage increases |
| 72 hours | Health risks escalate |
| 1 week | Permanent damage likely |
| 2 weeks | Extensive remediation needed |
When you act quickly, you not only protect your investment but also guarantee the safety of everyone in the environment. Proper drying and dehumidifying techniques can dramatically reduce the risks associated with water damage. Remember, the sooner you begin the drying process, the better your chances are for effective mold prevention and moisture management.
Dehumidifier Selection Tips
Selecting the right dehumidifier is a key step in the drying and dehumidifying process after water damage. With various dehumidifier types available, it's essential to choose one that matches your specific needs. For smaller spaces, a compact, portable unit might suffice, while larger areas may require a commercial-grade dehumidifier for effective moisture extraction.
Consider the energy efficiency of the model you select. Energy-efficient dehumidifiers not only reduce your electricity bill but also help minimize your environmental impact. Look for units with an Energy Star certification, as they meet strict efficiency guidelines.
Furthermore, evaluate the dehumidifier's capacity, typically measured in pints per day, which indicates how much moisture it can remove. For ideal performance, choose a unit that can handle at least 10% more than the estimated moisture load in your space.
Don't forget to check the maintenance requirements as well. A unit with a built-in pump can simplify draining, reducing the need for constant monitoring. By carefully considering these factors, you'll be better equipped to select a dehumidifier that effectively supports your water damage restoration efforts.
Monitoring Humidity Levels
Monitoring humidity levels is crucial during the drying and dehumidifying process after water damage. Proper humidity control is critical to preventing mold growth and guaranteeing a thorough restoration. To effectively manage moisture, you need to regularly measure humidity levels in the affected area using a hygrometer.
Here's a quick reference table to help you understand humidity levels and their implications:
| Humidity Level (%) | Condition |
|---|---|
| 30 – 50 | Ideal for drying |
| 50 – 70 | Caution: mold risk |
| 70 – 90 | High moisture presence |
| 90+ | Immediate action needed |
Aim for a humidity level between 30% and 50% for optimal drying conditions. If levels exceed 50%, it's crucial to improve your dehumidification efforts. Keep monitoring moisture measurement regularly to confirm that your equipment is functioning correctly and that the environment is suitable for drying. By staying vigilant and proactive, you can greatly reduce the risks associated with water damage and create a healthier living space.
Cleaning and Sanitizing
After water damage occurs, cleaning and sanitizing the affected areas becomes crucial to prevent mold growth and restore a safe environment. Depending on the water type—clean, gray, or black—your approach will vary. Start by evaluating the damage and documenting everything for your insurance claims. Use restoration products specifically designed for water damage to effectively eliminate contaminants and odors.
For mold prevention, verify surfaces are thoroughly cleaned and dried. If you're tackling this as a DIY project, employ proper techniques like scrubbing with a mold-inhibiting solution and using fans or dehumidifiers to improve air quality. Remember, prevention is key; act quickly to mitigate long-term issues.
If the damage is extensive, consider professional services. They possess advanced equipment and expertise to handle difficult situations, guaranteeing thorough sanitation. Regardless of your choice, prioritize odor removal as lingering smells can indicate remaining moisture and potential mold growth. Always wear protective gear during cleaning to safeguard your health. By following these steps, you contribute to a safer living environment, making educated choices about restoration and maintenance.
Repairing Structural Issues
Once the cleaning and sanitizing phase is complete, addressing structural issues becomes vital to restore your home's integrity. Begin by evaluating the affected areas for visible damage, such as sagging ceilings, warped walls, or weakened supports. These signs often indicate compromised structural integrity, which requires immediate attention.
Next, remove any damaged materials, like drywall or flooring, to expose the underlying structure. This step allows you to gauge the extent of the damage. If wooden beams or supports are affected, consider replacing them with treated wood to resist future moisture.
It's important to install moisture barriers to prevent further water infiltration. These barriers can be applied to walls, crawl spaces, and basements, creating a protective shield against potential leaks.
After addressing the damaged structures and installing moisture barriers, reinforce the remaining elements to guarantee stability. This may include adding support brackets or using specialized adhesives. Finally, conduct a thorough inspection to confirm that all repairs meet safety standards and restore your home's structural integrity. By taking these steps, you're not just fixing the damage; you're liberating your living space from future risks.
Preventing Future Damage

Even after addressing structural issues, ongoing vigilance is necessary to prevent future water damage. Implementing effective moisture control strategies is vital in safeguarding your home. Regular inspections of plumbing, roofs, and basements can help identify potential leaks before they escalate.
Here's a quick reference to keep in mind:
| Action | Purpose |
|---|---|
| Install dehumidifiers | Mold prevention |
| Check gutters regularly | Moisture control |
| Seal cracks and gaps | Prevent infiltration |
| Maintain proper drainage | Protect foundation |
By taking these steps, you not only combat mold prevention but further improve your home's overall resilience against water intrusion. Moreover, consider utilizing moisture-resistant materials in vulnerable areas like bathrooms and kitchens.
Keep an eye on humidity levels; ideally, they should remain below 60%. If you detect any signs of moisture or mold, act swiftly to mitigate potential damage. Remember, staying proactive is key to maintaining a safe, dry environment. With diligence, you can liberate your living space from the threat of water damage and enjoy peace of mind.
Conclusion
Within the realm of water damage restoration, think of your property as a delicate ecosystem. Just as a small leak can disrupt an entire habitat, even minor water issues can lead to significant problems if left unchecked. By following the step-by-step process outlined, you can restore balance to your environment. Remember, prompt action and thorough care can save you from costly repairs down the line. Stay vigilant, and don't let water become a silent invader in your home.
0 Comments