After a storm, quickly assess the damage by inspecting your property for structural issues, including cracks and leaks. Confirm your safety by checking for hazards like downed power lines and gas leaks. Document everything with clear photos and detailed notes for insurance purposes. Secure the area with barriers and signs to prevent unauthorized access. Consider temporary repairs like tarping damaged roofs and inspecting foundations for cracks. Remove any hazardous materials and communicate with your insurance provider about claims. Develop a thorough repair plan, including professional consultations, to verify your home's safety and integrity moving forward. More insights can improve your preparedness.
Key Takeaways
- Conduct a thorough damage assessment and document findings with clear photos and notes for insurance claims and future reference.
- Ensure personal safety by wearing protective gear, surveying hazards, and following evacuation procedures if the structure is unstable.
- Secure the area by installing safety barriers, posting warning signs, and restricting access to damaged zones.
- Implement temporary repairs like tarping roofs and inspecting foundations to prevent further damage and water intrusion.
- Consult with licensed contractors and structural engineers to assess damage and plan safe, compliant repairs.
Assess the Damage

Begin by thoroughly inspecting your property to assess the damage caused by the storm. Start with the exterior, checking the roof for missing shingles, leaks, or structural compromises. Look for cracks in the foundation or walls, as these can indicate serious issues that require immediate attention. Document any visible damage with photographs and detailed notes; this will be vital for filing your storm insurance claim.
Next, evaluate your windows and doors for broken seals or shattered glass. Water intrusion can lead to mold and further structural deterioration if left unaddressed. Inside, inspect ceilings for signs of water damage or sagging, as this can point to roof leaks.
Once you've compiled a detailed list of damages, estimate the repair costs by consulting professionals or using online resources for guidance. This information will be important when discussing your claim with your insurance provider. Remember, accurate assessments not only guarantee you receive appropriate coverage but also enable timely repairs, ultimately serving your community better by restoring safety to your neighborhood. Prioritize thoroughness in your evaluation to avoid overlooking any significant issues, guaranteeing that you address all necessary repairs efficiently.
Ensure Personal Safety
Before starting any repairs, you must assess immediate hazards around the damaged structure, such as downed power lines or unstable debris. Always wear appropriate protective gear, including helmets and gloves, to minimize the risk of injury. If the situation poses significant danger, evacuate the area promptly to guarantee your safety.
Assess Immediate Hazards
After a storm, it's crucial to assess immediate hazards to guarantee your safety and that of others nearby. Begin by surveying your environment for downed power lines, which can pose lethal risks. If you spot any, keep your distance and report them to the authorities. Next, inspect your structure for visible damage, such as cracks in walls or ceilings, which could indicate structural instability.
Use your emergency response training to identify potential hazards like gas leaks. If you smell gas or hear hissing, evacuate immediately and contact your utility company. Furthermore, be wary of sharp debris and unstable objects that could fall.
Implement storm preparedness strategies by creating a safe perimeter around your home. Mark areas that seem risky and avoid entry until professionals can evaluate them.
Wear Protective Gear
Once you've assessed immediate hazards, it's vital to prioritize your personal safety by wearing appropriate protective gear. Engaging in emergency structural repairs involves risks, so equipping yourself with the right safety equipment is critical. Here's a list of items you should consider:
- Hard Hat: Protects your head from falling debris or sharp objects.
- Safety Glasses: Shields your eyes from dust, flying particles, and other potential hazards.
- Heavy-Duty Gloves: Prevents cuts and scrapes while handling debris and tools.
- Steel-Toed Boots: Offers foot protection against heavy objects and provides better stability on uneven surfaces.
Wearing protective clothing is just as important. Opt for long sleeves and durable pants to shield your skin from abrasions and irritants. Confirm your clothing fits well to avoid snagging on protruding materials. Remember, your safety equipment should meet industry standards to guarantee maximum protection. By prioritizing your safety with these precautions, you can effectively serve others while minimizing your risk of injury during the repair process. Always be prepared and stay vigilant; your well-being is paramount in emergency situations.
Evacuate If Necessary
In emergency situations, your safety should always come first, and evacuating the area may be necessary to protect yourself from potential dangers. Assess the structural integrity of your surroundings; if there are visible damages, such as cracks or collapses, it's vital to evacuate immediately. Identify designated evacuation routes, which are often outlined by local authorities. Familiarizing yourself with these routes ahead of time can expedite your departure and guarantee you avoid hazardous areas.
Before you leave, gather important documents and items, but prioritize getting to safety. Inform family members or neighbors of your evacuation plans, and establish emergency contacts who can account for your safety. This communication helps maintain a support network during crises.
Once you're in a safe location, stay informed through reliable news sources or local emergency services. They can provide updates on the situation and any necessary instructions. Remember, the goal is to secure your well-being and that of others, so don't hesitate to evacuate regardless of your uncertainty. Your proactive measures can greatly improve safety for yourself and those around you in the aftermath of a storm.
Document the Damage

After a storm, it's vital to document the damage for insurance claims and repair assessments. Take clear photos from multiple angles to capture the extent of the destruction, and make detailed notes about each affected area. This thorough documentation will support your case when filing claims and guarantee you don't overlook any significant issues.
Take Clear Photos
Capturing clear photos of the damage is essential for effective documentation and future repairs. High-quality images not only help you assess the extent of the destruction but likewise serve as critical evidence when dealing with insurance claims or contractor assessments. To guarantee your photo documentation is effective, follow these steps:
- Use Natural Light: Aim to take photos during daylight hours for better visibility. Avoid shadows or glare that can obscure details.
- Capture Multiple Angles: Document each damaged area from various perspectives. This creates a thorough view of the damage.
- Focus on Details: Zoom in on specific issues, such as cracks or structural failures, to provide clear evidence of severity.
- Organize and Backup: After capturing your images, implement a photo organization system. Store them in a digital backup to prevent loss.
Make Detailed Notes
Detailed notes are crucial for accurately documenting the damage sustained during a storm. This documentation isn't just about listing what's broken; it's about understanding the impact on your property and preparing for repairs. Accurate records will as well ease insurance claims and aid in emergency preparedness for future storms.
To create a thorough record, consider using the following table structure to categorize the damage:
| Damage Type | Description | Estimated Cost |
|---|---|---|
| Roof Damage | Missing shingles, leaks | $2,500 |
| Wall Damage | Cracks, water stains | $1,200 |
| Foundation Issues | Settling, cracks | $5,000 |
| Window Damage | Broken glass, frames | $800 |
Secure the Area
Securing the area following a storm is crucial to guarantee safety and prevent further damage. You need to take immediate action to protect not only yourself but as well others in the vicinity. Here are four critical steps to evaluate:
- Assess the Environment: Identify hazards such as downed power lines, unstable structures, or debris. Confirm that no one enters these dangerous zones.
- Install Safety Barriers: Utilize safety barriers to outline hazardous areas. These barriers can effectively keep people at a safe distance from potential risks.
- Choose Fencing Options: If necessary, erect temporary fencing to restrict access to damaged areas. Options like orange construction fencing are visible and can be quickly deployed.
- Post Warning Signs: Clearly mark off affected zones with warning signs. This communication helps inform others about the dangers present and deters entry.
Temporary Roof Repairs
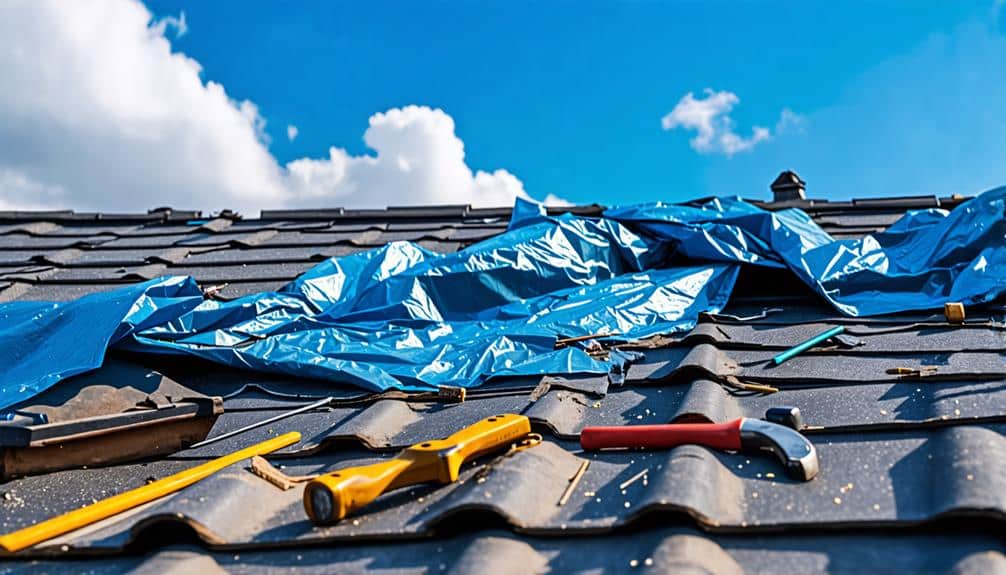
After confirming the area is secure, addressing roof damage becomes a top priority. Roof tarp installation is one of the most effective methods for providing immediate protection against further damage. To begin, select a durable tarp that exceeds the size of the affected area. Verify you have a partner to help with the installation for safety and efficiency.
Start by positioning the tarp over the damaged section of the roof. Use a sturdy ladder and be cautious of any remaining debris. Attach the tarp using nails or screws along the edges, making sure it's secured tightly to prevent it from being dislodged by wind or rain. For added stability, consider using furring strips to hold the tarp down.
If you notice smaller leaks or holes, temporary patching can be an effective solution. Use roofing cement or a similar adhesive to fill gaps, and reinforce these patches with strips of tarp or roofing material. Remember, these repairs are temporary; you should arrange for professional repairs as soon as possible. By taking these steps, you protect your home from further deterioration while you plan for permanent solutions.
Check for Water Intrusion
After securing temporary roof repairs, it's vital to check for water intrusion. Start by inspecting the roof and gutters for any signs of damage or blockages, then examine windows and doors for leaks. Don't forget to assess the foundation and walls, as these areas can likewise be vulnerable to water penetration.
Inspect Roof and Gutters
Inspecting your roof and gutters is crucial for identifying potential water intrusion after a storm. Proper roof maintenance and gutter cleaning can prevent extensive damage. Follow these steps to guarantee thorough inspections:
- Check for Missing Shingles: Look for any shingles that may have blown off or are damaged. Missing shingles expose your roof to leaks.
- Examine Seams and Flashing: Inspect the seams where different roofing materials meet, in addition to around chimneys and vents. These areas are prone to water infiltration.
- Inspect Gutters and Downspouts: Verify gutters are clear of debris and properly attached. Blocked or sagging gutters can lead to overflow, causing water to seep into your home.
- Look for Stains or Mold: Inside your attic or ceiling, check for water stains or mold growth, which indicate previous or ongoing leaks.
Examine Windows and Doors
Once you've assessed your roof and gutters, it's time to turn your attention to windows and doors, as these areas can likewise be vulnerable to water intrusion. Start by inspecting the window sealing. Look for any visible gaps, cracks, or signs of deterioration around the frames. If you notice any compromised areas, it's essential to apply a high-quality caulk or weather stripping to prevent further water damage.
Next, check the alignment of your doors. Misalignment can create openings that allow water to seep in during heavy rain. Make sure that doors close securely and that the hinges are functioning properly. Adjust or realign as necessary to maintain a tight fit.
After addressing any issues, monitor the interior for signs of moisture or mold. If you detect dampness, act quickly to dry the area and mitigate potential damage. Remember, timely intervention is key to preserving the integrity of your structure. By maintaining effective window sealing and guaranteeing proper door alignment, you can greatly reduce the risk of water intrusion and protect your home from further damage.
Assess Foundation and Walls
A thorough assessment of your foundation and walls is crucial for identifying potential water intrusion issues. This proactive approach not only guarantees safety but also preserves wall stability. Here's how to effectively evaluate your property:
- Inspect for Foundation Cracks: Look for visible cracks in the foundation. Any cracks wider than a quarter-inch may indicate serious structural issues and potential water entry points.
- Check for Dampness: Examine the interior and exterior walls for damp patches or mold growth. These signs can reveal hidden moisture problems that compromise wall stability.
- Evaluate Drainage Systems: Verify that gutters and downspouts are functioning correctly. Poor drainage can lead to water pooling near the foundation, increasing the risk of water intrusion.
- Assess Landscaping: Check the grading around your home. Landscaping should slope away from the foundation to prevent water from entering.
Reinforce Structural Integrity

Since a storm can compromise your structure's integrity, it's crucial to take immediate action to bolster it. Start by identifying the load bearing elements in your building, such as beams, columns, and walls. Inspect these components for any signs of damage or stress. If you notice any weaknesses, you'll want to use appropriate structural materials like steel plates or timber to strengthen these critical areas.
To improve stability, consider adding temporary bracing. This can help redistribute loads and prevent further structural failure. Confirm that any materials used for reinforcement are compatible with your existing structure; mismatched materials can worsen issues rather than resolve them.
Additionally, assess connections between load bearing elements. Reinforcing joints with steel brackets or additional fasteners can greatly enhance overall stability. Always prioritize safety; if you're unsure about the extent of damage or necessary repairs, consult a structural engineer.
Remove Hazardous Materials
After a storm, it's vital to identify and remove hazardous materials from your property to guarantee safety during repairs. Hazardous waste can pose significant health risks, so taking the right steps is fundamental. Here's what you should do:
1. Assess Damage: Inspect your property for any visible hazardous materials, such as broken glass, chemicals, or mold.
2. Identify Hazardous Waste: Recognize items that may contain harmful substances, like batteries, paints, or pesticides.
3. Use Proper Disposal Methods: Follow local regulations for disposing of hazardous waste. This may include:
- Contacting local waste management for collection schedules.
- Utilizing designated drop-off sites for hazardous materials.
- Engaging professionals for removal if the waste is extensive or particularly dangerous.
4. Document Everything: Keep a record of removed hazardous materials, including photos and disposal receipts, for safety and potential insurance claims.
Contact Insurance Providers

Once you've confirmed the area is free from hazardous materials, it's time to reach out to your insurance provider. Begin by documenting the damage thoroughly; take photos and detailed notes to support your insurance claim. This evidence will be vital in determining your coverage limits and the extent of your policy's protections.
When you contact your insurance provider, be clear and concise about the damage you've encountered. Explain the urgency of the situation, emphasizing any structural risks that may pose additional hazards. Inquire about the specifics of your coverage, including any deductibles or exclusions that may apply.
It's important to understand your policy's coverage limits to prevent surprises during the claims process. Ask your provider about how quickly they can dispatch an adjuster to assess the damage. This will help you expedite repairs and mitigate further issues.
Lastly, maintain open communication with your insurance provider throughout the claims process. Regular updates can guarantee that your claim is processed efficiently, allowing you to focus on the safety and well-being of those you serve. Your proactive approach can greatly impact your recovery efforts.
Plan for Permanent Repairs
Planning for permanent repairs requires a strategic approach to confirm your property is restored effectively and safely. To achieve long-term solutions, follow these crucial steps:
- Assess Damage: Conduct a thorough evaluation of your property, identifying all structural issues. Document these findings for your records and for any contractors you may hire.
- Consult Professionals: Engage with licensed contractors and structural engineers who are familiar with local building codes. Their expertise guarantees your repairs meet safety standards.
- Develop a Repair Plan: Create a detailed plan that outlines necessary repairs, materials, and timelines. Prioritize areas that pose immediate safety risks while considering long-term durability.
- Obtain Permits: Before commencing repairs, secure any required permits. Compliance with building codes not only avoids legal complications but likewise confirms that your repairs are up to standard.
0 Comments